In this tutorial I’ll show you the way I use to create sci-fi ruined industrial tabletop bases.
This method is really easy; first I’ll create the base using common material and then I’ll show you how I've painted it.Note for the Italian readers: potete leggere questo articolo in italiano su Triplozero.com a questo indirizzo: link.
In this guide I’ve used a classical 4 cm Games Workshop rounded base, the one you can use for a Space Marine Terminator.
For the very first thing, let’s take a look at all the stuff we will need for this job. When you have to build a sci-fi base remember one thing, the hardware store is your best friend! In fact everything I needed was taken in a hardware store near my house for a bunch of euros. In the picture you can see bolts and flat washers of different size and shape, a metallic mesh, some corrugated metal sheets (made using this tutorial, do you remember it?) end a few metal rods. In a modeling shop I’ve bought small plasticard I-beams and some little pipes.
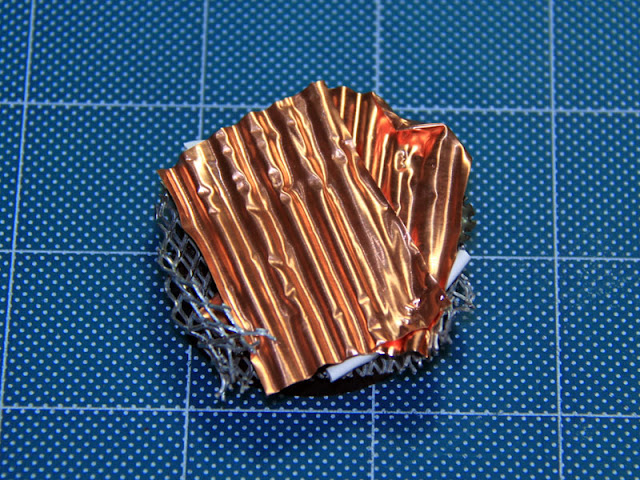
I’ve placed the very first corrugated metal sheet. Remember to glue every single piece, step after step.
Since my base will represent an industrial ruin, I’ve started to weather it a bit. That was very easy. I’ve used a pair of pliers and hammered it on the metal (do not use too much strength… you are not forging a blade :D )! Ultra easy. With the same pliers I’ve bent the metal part that spanned too much outside the base. It gave more the effect of a ruined structure.
I’ve added another layer of flat washers and strings.
At this stage I have noticed that the base was slightly sloping in the front. I have solved this problem adding another layer of corrugated metal sheet. As you can see, building this kind of base is really a dynamic process. Nothing is decided beforehand.
Ok, it’s time to paint the base. Black primer and eventually another layer of diluted black acrylic color with a brush (not shown in the picture).
I’ve painted with some drybrush the corrugated metal sheets, adding more and more gold to the Warplock Bronze after each step.
I’ve painted all the remaining parts. Base of Boltgun Metal and lights adding Mithril Silver. I’ve given the color using drybrush only.
I’ve given more shadows with a black color. I’ve painted it using glazes on the lower parts of every single piece of metal.
In the last passage I’ve simulated the rust on the metals. I’ve made it using only an orange color, not very diluted and “dabbed” on the model using the tip of the brush.
The base is finished!


No comments:
Post a Comment